> For the complete documentation index, see [llms.txt](https://docs.whaly.io/llms.txt). Markdown versions of documentation pages are available by appending `.md` to page URLs; this page is available as [Markdown](https://docs.whaly.io/connectors/ssh-tunneling.md).
# SSH Tunneling
If it's not possible to provide direct access to your database port, you can connect to Whaly using an SSH tunnel. You can also choose this connection method for an added layer of security. To connect using an SSH tunnel, you need to set up an SSH tunnel server that has access to your database port. The tunnel server's SSH port needs to be accessible from [Whaly's IP](/connectors/whitelisting-whaly-connectors-ips.md). You’ll also need to create an SSH user for Whaly.
> IMPORTANT: Whaly generates a unique public SSH key for each warehouse. We support multiple connectors on a single SSH tunnel depending on the data volume and network bandwidth.
Follow the SSH tunnel setup instructions for your operating system:
## Linux
### Create SSH User
Log in to your SSH tunnel host and run the following commands:
1. Create group `whaly`:
```ebnf
sudo groupadd whaly
```
2. Create user `whaly`:
```ebnf
sudo useradd -m -g whaly whaly
```
3. Switch to the `whaly` user:
```ebnf
sudo su - whaly
```
4. Create the `.ssh` directory:
```bash
mkdir ~/.ssh
```
5. Set permissions:
```bash
chmod 700 ~/.ssh
```
6. Change to the `.ssh` directory:
```bash
cd ~/.ssh
```
7. Create the `authorized_keys` file:
```bash
touch authorized_keys
```
8. Set permissions:
```apache
chmod 600 authorized_keys
```
9. Using your favorite text editor, add the public SSH key that was sent to you by email to the `authorized_keys` file. The key must be all on one line. Make sure that you don’t introduce any line breaks when cutting and pasting. The public SSH key is generated uniquely for each Whaly warehouse.
10. Make sure that port access is allowed, [see here.](#allow-port-access)
## Allow port access
Make sure that port access is allowed from:
1. [Whaly's IP](/connectors/whitelisting-whaly-connectors-ips.md) to your tunnel server's SSH port
2. Your SSH tunnel server to your source database port
If your SSH server and database happen to be in AWS, you can follow the instructions below to configure port access.
### AWS
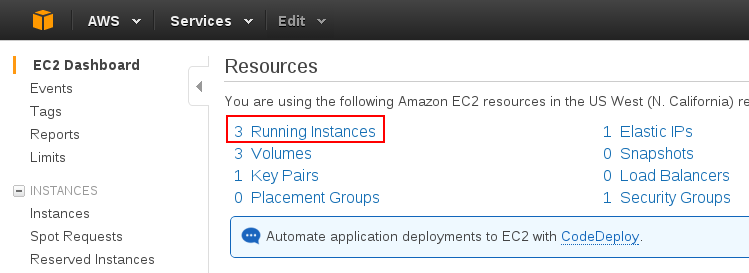
1. To configure an SSH server in AWS, open the EC2 console and select **Running Instances**:
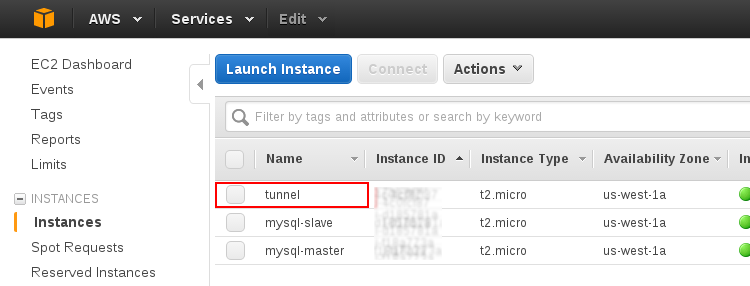
 2. Select the instance you intend to use as an SSH tunnel:
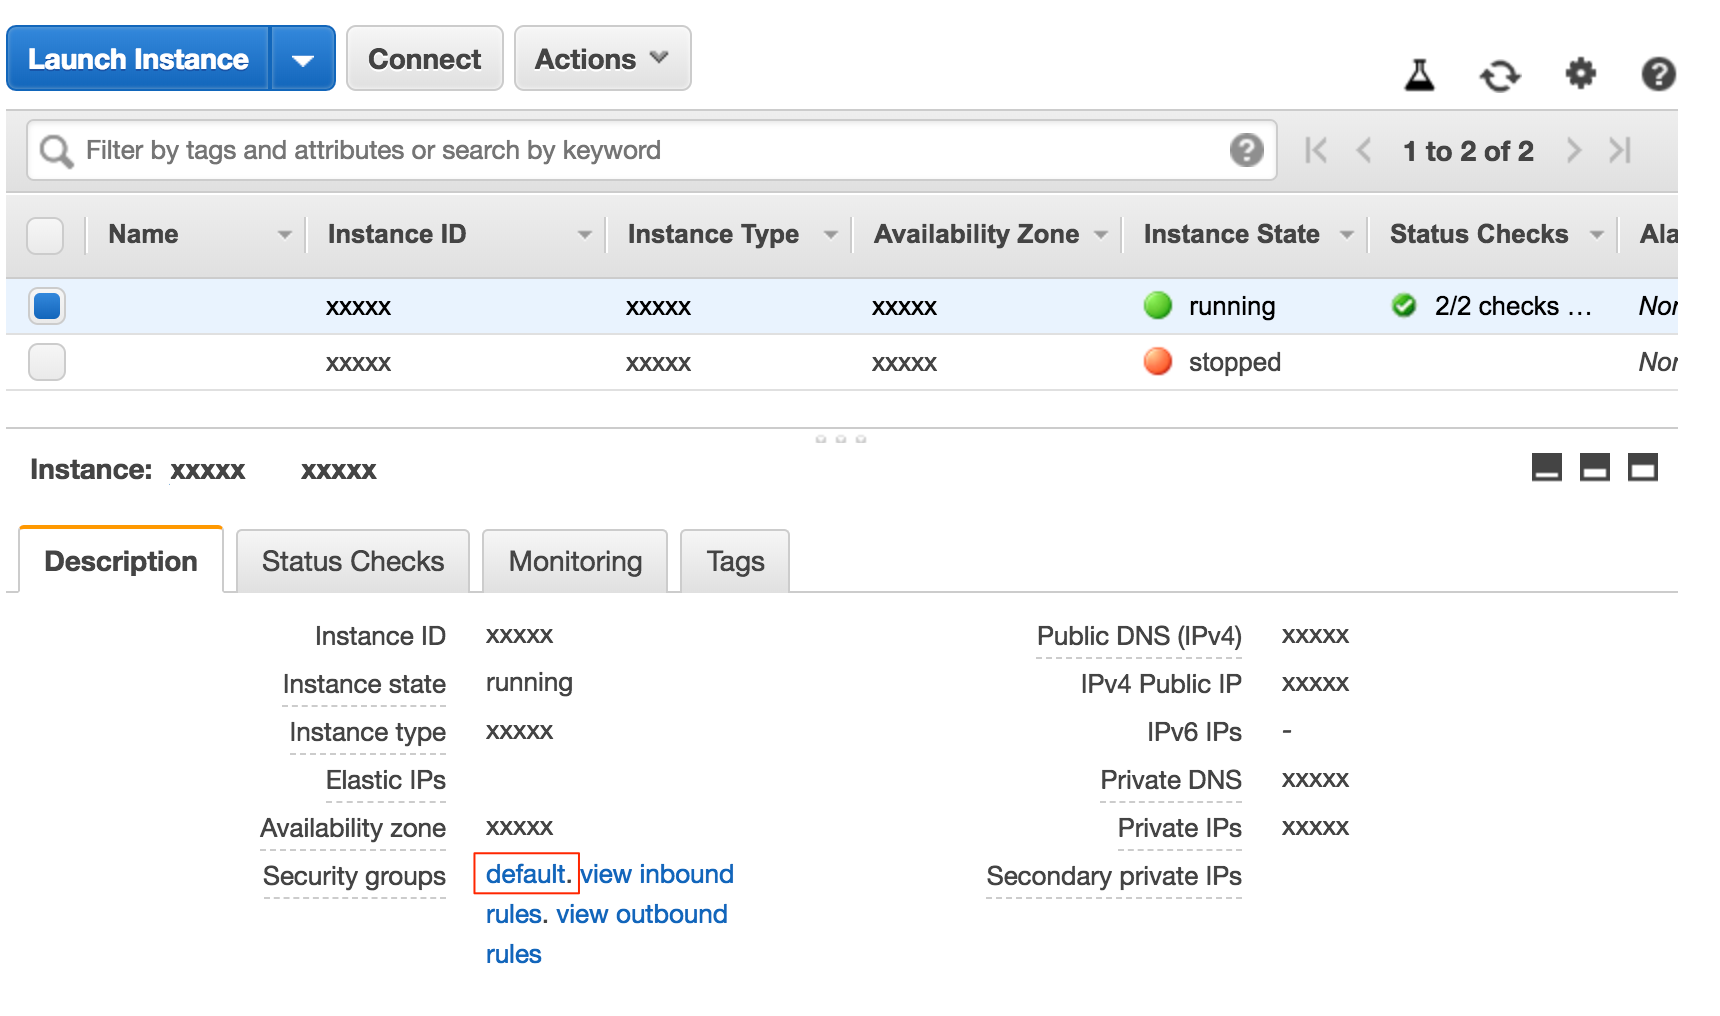
 3. Select the **Security groups** and then select **default**:
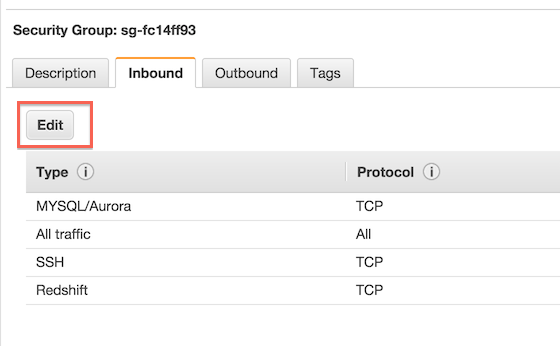
 4. Select the **Inbound** tab.
5. Click **Edit**.
4. Select the **Inbound** tab.
5. Click **Edit**.
 6. Fill in [Whaly's IP](/connectors/whitelisting-whaly-connectors-ips.md) and your SSH port (do not use a load balancer).
7. For VPC or EC2 classic, add a security rule:
6. Fill in [Whaly's IP](/connectors/whitelisting-whaly-connectors-ips.md) and your SSH port (do not use a load balancer).
7. For VPC or EC2 classic, add a security rule:
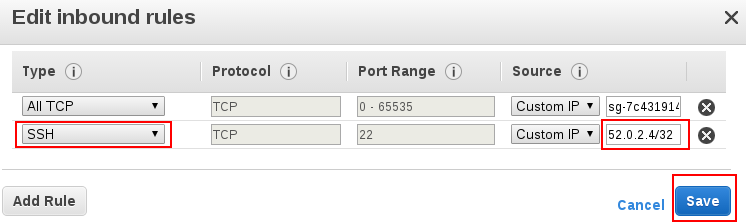
 8. Select **SSH**, enter [Whaly's IP](/connectors/whitelisting-whaly-connectors-ips.md), and click **Save**:
 9. To complete setting up your database connector, follow the setup instructions for your specific database in Whaly.
---
# Agent Instructions
This documentation is published with GitBook. GitBook is the documentation platform designed so that both humans and AI agents can read, navigate, and reason over technical content effectively. Learn more at gitbook.com.
## Querying This Documentation
If you need additional information that is not directly available in this page, you can query the documentation dynamically by asking a question.
Perform an HTTP GET request on the current page URL with the `ask` query parameter, and the optional `goal` query parameter:
```
GET https://docs.whaly.io/connectors/ssh-tunneling.md?ask=&goal=
```
`ask` is the immediate question: it should be specific, self-contained, and written in natural language.
`goal` is optional and describes the broader end goal you are ultimately trying to accomplish on behalf of the user. GitBook uses it to tailor the answer towards what is most useful for that goal.
The response will contain a direct answer to the question and relevant excerpts and sources from the documentation.
Use this mechanism when the answer is not explicitly present in the current page, you need clarification or additional context, or you want to retrieve related documentation sections.
9. To complete setting up your database connector, follow the setup instructions for your specific database in Whaly.
---
# Agent Instructions
This documentation is published with GitBook. GitBook is the documentation platform designed so that both humans and AI agents can read, navigate, and reason over technical content effectively. Learn more at gitbook.com.
## Querying This Documentation
If you need additional information that is not directly available in this page, you can query the documentation dynamically by asking a question.
Perform an HTTP GET request on the current page URL with the `ask` query parameter, and the optional `goal` query parameter:
```
GET https://docs.whaly.io/connectors/ssh-tunneling.md?ask=&goal=
```
`ask` is the immediate question: it should be specific, self-contained, and written in natural language.
`goal` is optional and describes the broader end goal you are ultimately trying to accomplish on behalf of the user. GitBook uses it to tailor the answer towards what is most useful for that goal.
The response will contain a direct answer to the question and relevant excerpts and sources from the documentation.
Use this mechanism when the answer is not explicitly present in the current page, you need clarification or additional context, or you want to retrieve related documentation sections.